GRADES 7/8:
Look at the difference between these two images:

Which one is more interesting? The one that has more carved out of it is much more complex and full of variety - that makes it a better image even if there might be a little less contrast. Your print may start out as a basic line design like the one on the left, but you should keep on working! Create patterns of lines! As you decide which areas to carve out as a solid, remember that each stroke of the tool will create a little ridge unless you completely remove it.
When I finished this design, I wasn't happy with the look of the bird - the beak had some mistakes and I didn't care for the eyes, either, so I just flipped my printing plate over and worked with a slightly different design on the back! If you don't like how your first image turns out, you have another chance to do a better one on the other side! You have lots of opportunities to solve problems with this Softoleum printing plate. How can you make a "mistake" into something you love? Could you add a line pattern? Could you carve out the mistake? Is it really an important part of the design or could you live with it?
GRADE 6:

Today's Student Objectives:
I can complete the printmaking study guide - there will be a test on Friday (April 22, 2016).I can work on preparing my relief printing plate, making sure to fill the entire space with the design. It should have some thick lines, some thin lines, and some solid areas. (Whether you chose to do a drawing based on nature or a drawing based on formal design.)
Exit Slip:
Describe how your design relates to the theme of beauty. Why did you choose this design? What about it is beautiful to you? How do you think other people will respond to your work?
student responses:


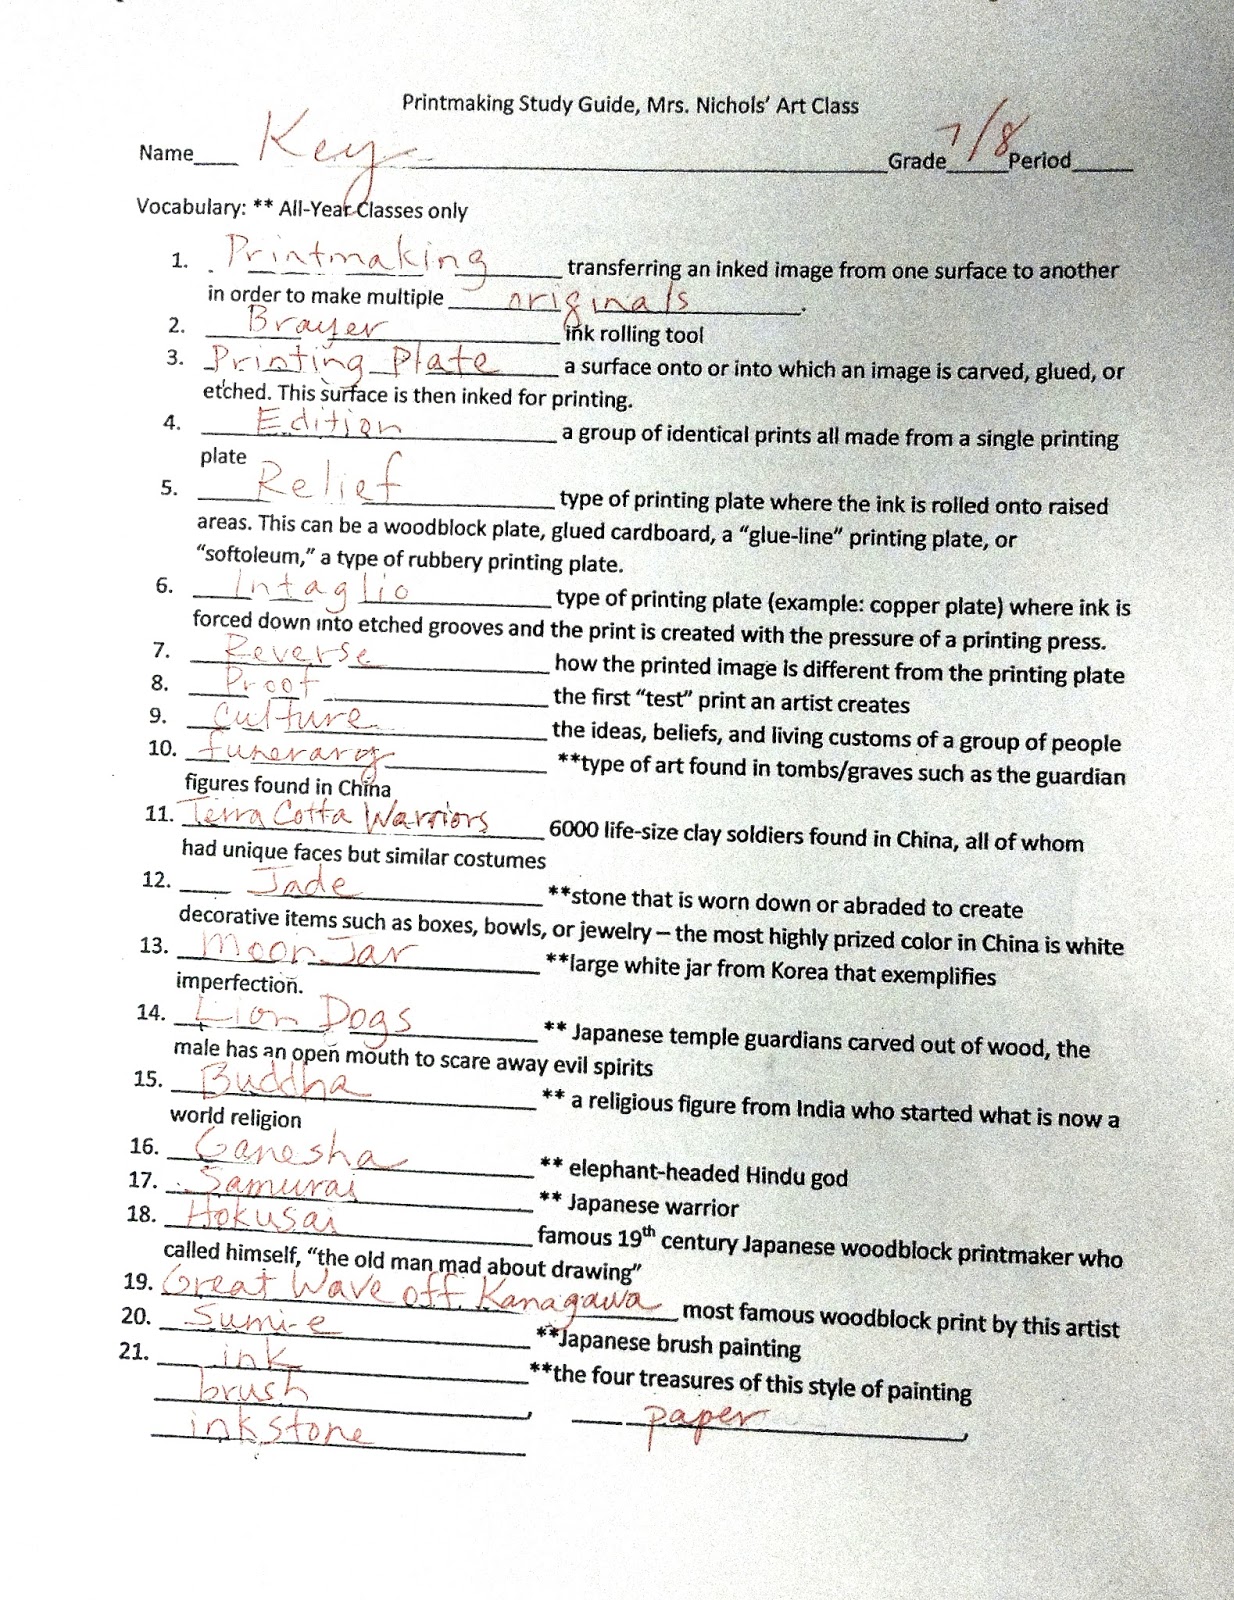
Study Guide For 7th/8th Grade Test:
Study Guide For 6th Grade Test:

Printmaking Rubric For 7th/8th Grades:

Today's lesson met the National Core Visual Art Standards
Anchor Standard #1: The student will generate and conceptualize artistic ideas and work.
Anchor Standard #2: The student will organize and develop artistic ideas and work.